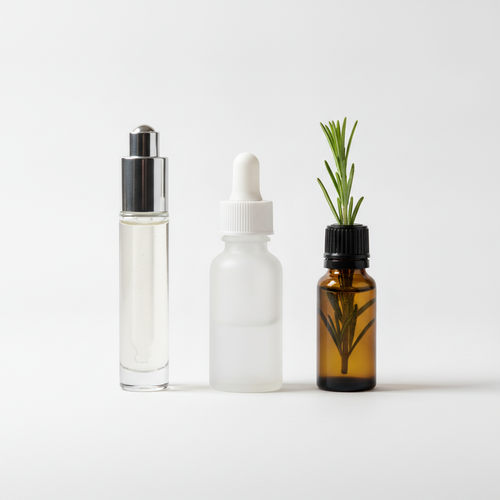
You’re probably here because you like the idea of knowing exactly what touches your skin. Maybe you already double cleanse, maybe you’ve fallen for the texture of a good Korean cleansing oil, or maybe you’re tired of buying formulas that feel too heavy, too stripping, or too fragranced.
That instinct makes sense. Cleansing oil diy became popular for a reason. It teaches you how oil cleansers work, why some rinse clean while others leave a film, and how skin type changes everything. It also reveals an important truth that seasoned K-Beauty users learn quickly. A simple homemade blend can be satisfying, but elegant performance is much harder to formulate than it looks.
The K-Beauty Inspired Rise of DIY Cleansing Oil
The modern interest in cleansing oil diy traces back to one of K-Beauty’s most influential habits, the double cleanse. The first cleanse uses oil to loosen sunscreen, makeup, and sebum. The second uses a water-based cleanser to remove what’s left behind. Once people felt how much gentler that approach could be than aggressive foaming cleansers, they wanted to recreate it at home.
The trend gained significant traction in the mid-2010s alongside the global spread of K-Beauty, and accessible recipes featuring self-emulsifying ingredients like Cromollient SCE at 15% helped home formulators imitate high-end cleansing oils inspired by brands like Banila Co. at a lower cost, as noted in A Life Adjacent’s DIY cleansing oil guide.

Why oil cleansing felt revolutionary
Oil cleansing looks counterintuitive until you try it properly. Oil binds well with oil-based debris on the skin, so it can break apart long-wear makeup, water-resistant sunscreen, and excess sebum without that squeaky, over-cleansed finish many people get from harsh surfactants.
For K-Beauty enthusiasts, this wasn’t just about removing makeup. It fit a bigger philosophy. Cleanse thoroughly, but preserve comfort. Support the barrier. Avoid turning cleansing into irritation.
Practical rule: The best cleansing oil doesn’t make your skin feel “stripped clean.” It makes your skin feel clean enough to move on to the rest of your routine.
Why DIY appeals to ingredient-savvy users
DIY also scratches a very specific itch. If you understand ingredients like niacinamide, retinol, ferments, or heartleaf, it’s natural to ask whether you can build your own first cleanse too.
A homemade oil cleanser gives you control over:
- Texture: You can go lighter with grapeseed or more cushioned with olive or jojoba.
- Skin feel: You can reduce castor oil if your skin feels tight after use.
- Rinse-off behavior: You can include an emulsifier so the oil turns milky with water instead of clinging to the skin.
- Fragrance choices: You can keep the formula plain and skip essential oils if your skin is reactive.
That said, DIY works best when you treat it like a formulation project, not a kitchen shortcut. K-Beauty inspired this category, but Korean cleansing oils became cult favorites because they pair good oils with smart emulsification systems and a stable, consistent user experience. That’s the standard worth learning from, even if you enjoy making your own.
Choosing Your Perfect Oil Blend by Skin Type
Most cleansing oil diy failures don’t come from the method. They come from the blend. Too much castor oil and the formula can feel harsh. Too rich a carrier oil and the rinse-off can feel heavy. No emulsifier and the oil may drag makeup around instead of lifting it cleanly.
A workable DIY formula has three parts. First, the base oil, which makes up most of the blend and determines glide. Second, the cleansing or astringent oil, usually castor oil, which adds that deep-cleaning feel. Third, the emulsifier, which helps the oil rinse off with water.
The three parts that matter most
Use this as your decision framework:
- Base oils at 70 to 80%: These create the main texture and skin feel.
- Castor oil at 20 to 30%: This is the classic cleansing component in many DIY recipes.
- An emulsifier when you want easier rinse-off: This is what separates “massage oil” from something that behaves more like a true cleansing oil.
Many DIY guides stay vague, but a more scientific approach matters. One cited example suggests that blending Korean rice bran oil at 70% with 20% squalane can give better pore clearance than a traditional olive-castor blend, especially for acne-prone skin, according to Toups & Co’s oil cleansing guide.
DIY Cleansing Oil Selection Guide
| Skin Type | Recommended Base Oils (70-80%) | Comedogenic Rating | Notes |
|---|---|---|---|
| Oily | Grapeseed | 0-1 | Light feel. Pairs well with castor oil when you want a less greasy finish. |
| Dry | Olive | Not provided in verified data | Richer, more cushioning feel. Better for skin that dislikes that “tight” after-cleanse sensation. |
| Combination | Almond | Not provided in verified data | Middle-ground option when cheeks feel drier than the T-zone. |
| Acne-prone | Rice bran, squalane | Rice bran 0-1 | A more K-Beauty minded option when you want a lighter, lower-clogging feel. |
| Balanced or unsure | Jojoba | 2 | Often chosen because it gives a smooth slip and a familiar, skin-like feel. |
Matching the formula to your skin reality
The classic ratios from DIY oil cleansing still help as a starting point:
- Oily skin: A 1/3 castor to 2/3 grapeseed oil ratio is a practical place to begin.
- Dry skin: A 1/2 olive and 1/2 castor blend gives a richer cleanse.
- Combination skin: A 1/4 castor and 3/4 almond blend is a more moderate option.
These are starting points, not guarantees. Climate, sunscreen habits, and how much makeup you wear all affect what feels good. If you wear tenacious SPF daily, an emulsifier becomes much more important. If you’re acne-prone, the “cleaner” feeling of more castor oil can backfire if your skin ends up dehydrated and reactive.
A good blend should remove the day without making your face feel like it needs immediate rescue.
How to Formulate and Mix Your Cleansing Oil
Once you’ve chosen your oils, formulation is mostly about precision and cleanliness. Here, cleansing oil diy shifts from casual mixing to proper home formulation. If your ratios drift, your rinse-off changes. If your tools aren’t clean, you’re setting yourself up for a short-lived product.
For an effective starting structure, aim for a base oil at 70 to 80% and castor oil at 20 to 30%. For oily skin, the 1/3 castor to 2/3 grapeseed ratio is a proven DIY benchmark. To support oxidation stability, add Vitamin E at 1 to 3% to the final mixture, as recommended in Wellness Mama’s oil cleansing method guide.

A simple K-Beauty inspired formula logic
If you want your homemade cleanser to act more like a modern oil cleanser, think in layers:
- Choose your oil blend based on skin type.
- Add an emulsifier if you want that milky rinse-off effect.
- Add Vitamin E to help slow oxidation.
- Bottle it in clean glass and keep the formula dry.
A practical example would look like this in structure, not exact grams: most of the bottle is your carrier oil, a smaller portion is castor oil, then your emulsifier, then a small amount of Vitamin E. If you already know you dislike residue, don’t skip the emulsifier.
Mixing method that keeps things tidy
Use a small digital scale if you have one. It’s much easier to repeat a formula when you measure properly instead of estimating by eye.
You’ll want:
- A dark glass bottle: Better for light protection.
- A small funnel: Less waste, less mess.
- A sterilized beaker or mixing cup: Keep the process clean.
- A stirring rod or spoon: Dedicate one to skincare projects if you do this often.
Then mix in this order:
- Add your carrier oil first. This gives you the bulk of the formula and makes it easier to gauge volume.
- Pour in the castor oil next. Stir slowly until the blend looks fully uniform.
- Incorporate the emulsifier. Go slowly and mix thoroughly so the final product rinses more evenly.
- Finish with Vitamin E. This is the last support ingredient, not the main event.
Bench note: If the cleanser feels draggy during massage, the formula is usually too heavy in castor oil or too light on slip.
Let the bottle sit briefly, then shake again before first use. If the blend separates, your mixing wasn’t thorough enough or your ingredient choices aren’t playing well together. That’s one of the hidden lessons in DIY. Professional formulas don’t just list nice oils. They’re built to behave predictably every time you use them.
Essential Safety Storage and Patch Testing
This is the part most DIY tutorials rush past, and it’s the part that matters most. A homemade cleanser may feel lovely on day one and still become a bad idea later if it oxidizes, gets contaminated, or doesn’t agree with your skin.
A major risk in DIY skincare is stability. Without preservatives, homemade oils are prone to oxidation and microbial growth, especially in humid climates. Vitamin E at 0.5 to 1% can help as an antioxidant, but it doesn’t stop bacterial contamination and may only extend shelf life by 50% compared with the 18-month stability of a commercial K-Beauty oil like Anua Heartleaf, according to PureWow’s discussion of DIY cleansing oil stability.

Patch testing isn’t optional
Even if every ingredient looks familiar, the final blend is still new to your skin. Test it before you massage it all over your face, especially if you’re prone to dermatitis, clogged pores, or stinging around the eyes.
Keep the process simple:
- Apply a small amount to the inner arm or along the jawline.
- Wait and observe for redness, itching, burning, or delayed bumps.
- Test again if needed before making it your nightly cleanser.
This matters even more with essential oils, which many DIYers add too casually. If you’re trying to build a reliable cleansing oil, plain is often smarter.
How to store it without sabotaging it
Oil formulas degrade faster when exposed to heat, light, wet fingers, and repeated air exposure. A cleanser in a clear bottle near a steamy sink won’t age gracefully.
Store it this way:
- Use dark or opaque packaging: Light speeds up breakdown.
- Keep the bottle tightly closed: Less air exposure helps.
- Avoid introducing water: Water contamination changes the risk profile fast.
- Store in a cool place: Especially if your bathroom gets warm and humid.
Watch for practical warning signs. A stale smell, a sharper odor than when you mixed it, or a texture that seems off are all reasons to stop using it.
If your DIY cleansing oil smells “old,” behaves differently, or starts making your skin angry, throw it out. Saving the batch isn’t worth saving the batch.
Professional cleansers usually win. They’re formulated for stability, tested for consistency, and packaged to survive real bathrooms, not ideal ones.
Your K-Beauty Double Cleanse Routine
A good cleansing oil doesn’t do much if you use it like a face wash. K-Beauty technique matters. The first cleanse goes onto dry skin with dry hands, because oil breaks down oil-soluble debris best before water gets involved.

The right way to use your DIY oil
Start with a small amount in your palms and spread it over a dry face. Focus first on the areas that hold the most buildup, usually around sunscreen-heavy zones, base makeup, and eye makeup.
Then work through this sequence:
- Massage onto dry skin with gentle circular motions.
- Give it time to loosen makeup, sebum, and the day’s residue.
- Add a little water if your formula contains an emulsifier. It should turn slightly milky.
- Rinse or wipe away thoroughly.
- Follow with a water-based cleanser to complete the double cleanse.
The feel you want is slip, not friction. If your skin tugs during massage, the formula is too dry, too castor-heavy, or you’re using too little product.
What changes when the formula emulsifies well
An emulsified cleansing oil behaves differently from a plain oil blend. Once water touches it, the cleanser softens into a milkier texture and releases from the skin more easily. That cleaner rinse is one reason Korean cleansing oils feel so refined in use.
If your DIY blend doesn’t emulsify much, you can still remove it with a soft, damp cloth. Just be gentle. The washcloth should help lift residue, not abrade your barrier.
For a visual walkthrough of facial cleansing technique, this demo is useful:
The second cleanse does a different job
The water-based cleanser isn’t there to “undo” the oil. It finishes the job. After the first cleanse lifts sunscreen, makeup, and surface oils, the second cleanse removes remaining residue and leaves skin ready for hydrating toners, essences, and treatment steps.
A few practical reminders help:
- Night is when this matters most: That’s when you’re removing sunscreen, makeup, and city grime.
- Use a gentle second cleanser: You don’t need a harsh foaming wash after an oil cleanse.
- Don’t overmassage: More rubbing doesn’t equal cleaner skin.
- Check your skin after rinsing: Clean, calm, and comfortable is the target.
When people say oil cleansing “didn’t work,” the issue is often the routine, not the concept. Wrong blend, poor rinse-off, or skipping the second cleanse can make a good method look bad.
When to Choose a Professional K-Beauty Cleanser
DIY is worth trying if you enjoy formulation and want to understand the mechanics of oil cleansing. It teaches you what your skin likes, what residue feels like, and why rinse-off quality matters so much. It can also make you much pickier in a good way.
But there’s a point where homemade formulas stop being charming experiments and start feeling limiting.
What DIY does well and where it falls short
DIY works well when you want:
- Ingredient control: You choose every oil in the bottle.
- A simple formula: No mystery texture modifiers or fragrance blends.
- A learning tool: You start to notice how carrier oils and castor ratios change the cleanse.
DIY struggles when you want:
- Consistent emulsification: Homemade blends often rinse less cleanly than professional systems.
- Stability: Oxidation and contamination are real concerns.
- Elegant texture: Lightweight, silky, non-clouding formulas are hard to replicate at home.
- High tolerance around the eyes: Professional cleansing oils are often much more refined in use.
Why professional formulas often perform better
A strong Korean cleansing oil isn’t just oil in a pump. It’s usually a carefully balanced formula with a rinse-off system, stable packaging, and a texture designed to remove heavy sunscreen and makeup without a greasy afterfeel.
That matters in daily life. You don’t need your cleanser to be interesting. You need it to work every night, remove stubborn SPF, stay stable in your bathroom, and leave your skin ready for the rest of your routine.
Professional cleansing oils usually win on the details users feel immediately. Better slip, cleaner rinse, fewer surprises.
There’s also the issue of formulation discipline. Brands can build in features that are difficult to mimic at home, such as advanced emulsifier systems, calming botanical support, and a more balanced sensory profile. If you’ve ever tried a DIY blend after using a polished Korean cleanser, you’ve probably felt the difference in the rinse alone.
A practical decision filter
Choose DIY if you enjoy the process and you’re comfortable treating it like a small home lab project.
Choose a professional K-Beauty cleanser if you care most about:
| Priority | DIY blend | Professional cleanser |
|---|---|---|
| Ingredient simplicity | Strong | Varies by formula |
| Stability | Limited | Stronger |
| Rinse-off elegance | Variable | Usually better |
| Convenience | Lower | Higher |
| Repeatable performance | Variable | More reliable |
That’s the main trade-off. Cleansing oil diy is a great gateway into K-Beauty thinking. Professionally made cleansing oils are usually the better long-term tool.
If you’re ready to move from experimenting to consistently polished results, explore Mirai skin for authentic Korean skincare from verified Korean distributors. It’s a strong place to compare cleansing oils that deliver the silky rinse, stability, and everyday reliability that DIY often can’t match.